OpenCapture › How-to › Screenshot extension for Edge
Screenshot extension for Edge — where Web capture stops
Microsoft Edge has the most complete screenshot tool of any desktop browser, and on an ordinary page it is all you need. This page is not about those pages. It is about the five points where Web capture runs out, how to recognise each one, and what a screenshot extension for Edge does that the built-in cannot.
Looking for the steps instead? Web capture’s three modes, its keyboard shortcut and its markup step are written out, with screenshots, in how to take a scrolling screenshot on desktop. Start there if you have not used it yet — this page picks up where that one ends.
Where Web capture runs out
Five limits. None of them is a bug; they are all places the feature was scoped to stop.
It writes JPEG, and only JPEG
Save produces a .jpeg file. There is no PNG option anywhere in the flow, and no setting that adds one. JPEG is a lossy format built for photographs, so the things a web page is mostly made of — small text, table rules, one-pixel borders, flat blocks of colour — are exactly what it handles worst. On a short capture you will not notice. On a tall one you will.
Capture full page comes back smaller than the page
The full-page mode renders the page slightly reduced rather than at the size it was on screen; users comparing the two have put it at around 94 per cent, and there is no setting that turns it off. Combined with the JPEG step above, that is how a capture of a dense table or a code block comes back with text you cannot read, on a page that was perfectly legible a second earlier. Capture area does not rescale, which is the quickest way to confirm that this is what you are looking at: drag a box over the same paragraph and compare.
Anything that scrolls inside a panel is left out
Capture full page follows the document’s own scrollbar. When a page instead puts its content in a pane that scrolls by itself — an admin console, a dashboard, a long table in a fixed-height container, an embedded frame — the capture comes back with the visible part of that pane and nothing below it. The rest of the page around it captures fine, which is what makes it confusing: the output looks complete until you notice the table stops mid-row. This is the single most common reason a full-page capture in Edge “only takes what is on screen”.
You can add marks, but you cannot take anything out
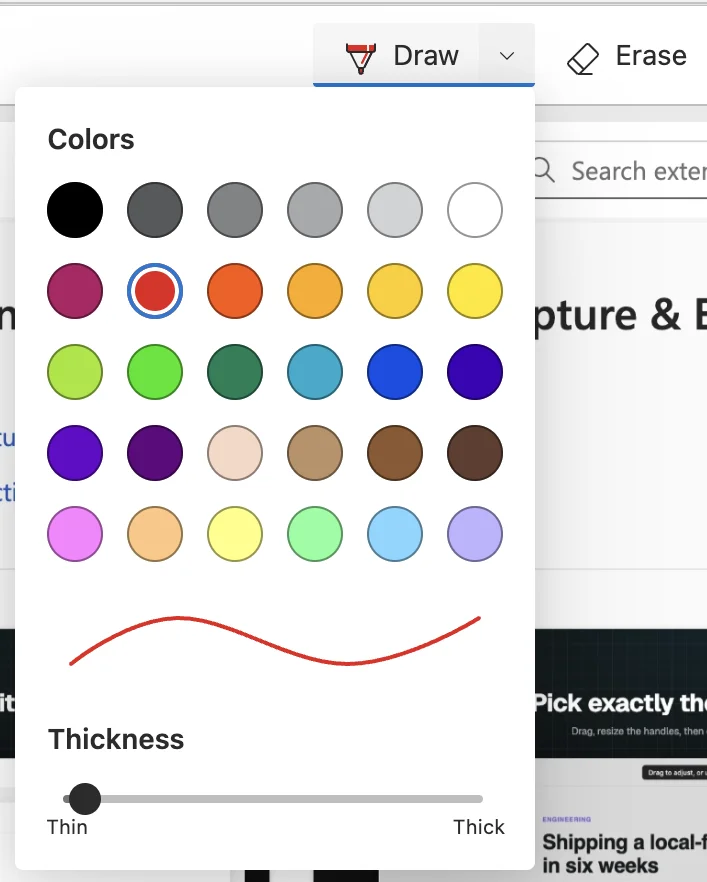
The markup step gives you a pen, a choice of colours and thicknesses, and an eraser. The eraser removes your own ink, not the page underneath it. So there is nothing in Web capture that will blur an email address, cover an account number, or crop a row off the bottom before the file goes into a ticket — and drawing a filled rectangle over something is not the same as removing it. What actually has to happen to a screenshot before it is safe to share is in blurring sensitive information in screenshots.
There is no PDF — and the print route gives you a different document
Web capture produces an image, full stop. Edge’s route to a PDF is Ctrl + P and Save as PDF, which is a different operation: it re-typesets the page for paper, so it introduces page breaks wherever they happen to land, can drop background colours, and adds headers and footers. That is the right answer when you want a readable document and the wrong one when you want the page as it looked. Why the two produce such different files is in saving a webpage as a PDF.
The DevTools route is there too
Edge is built on Chromium, so the developer-tools capture command that Chrome users fall back on is in Edge as well: F12, then Ctrl + Shift + P, then Capture full size screenshot. It writes a PNG, which solves the format problem, and it does not rescale. It also has no preview and no editing step, and it inherits the same engine-level limits — all four of them are set out in how to take a full page screenshot in Chrome, and they apply here unchanged.
What a full screenshot extension adds
This is where OpenCapture fits. It is a full screenshot extension that runs in Edge, Chrome and Firefox from the same codebase, it is free, and it needs no account.
- Install it from Edge Add-ons and pin the icon to your toolbar.
- Open the page you want and click the OpenCapture icon.
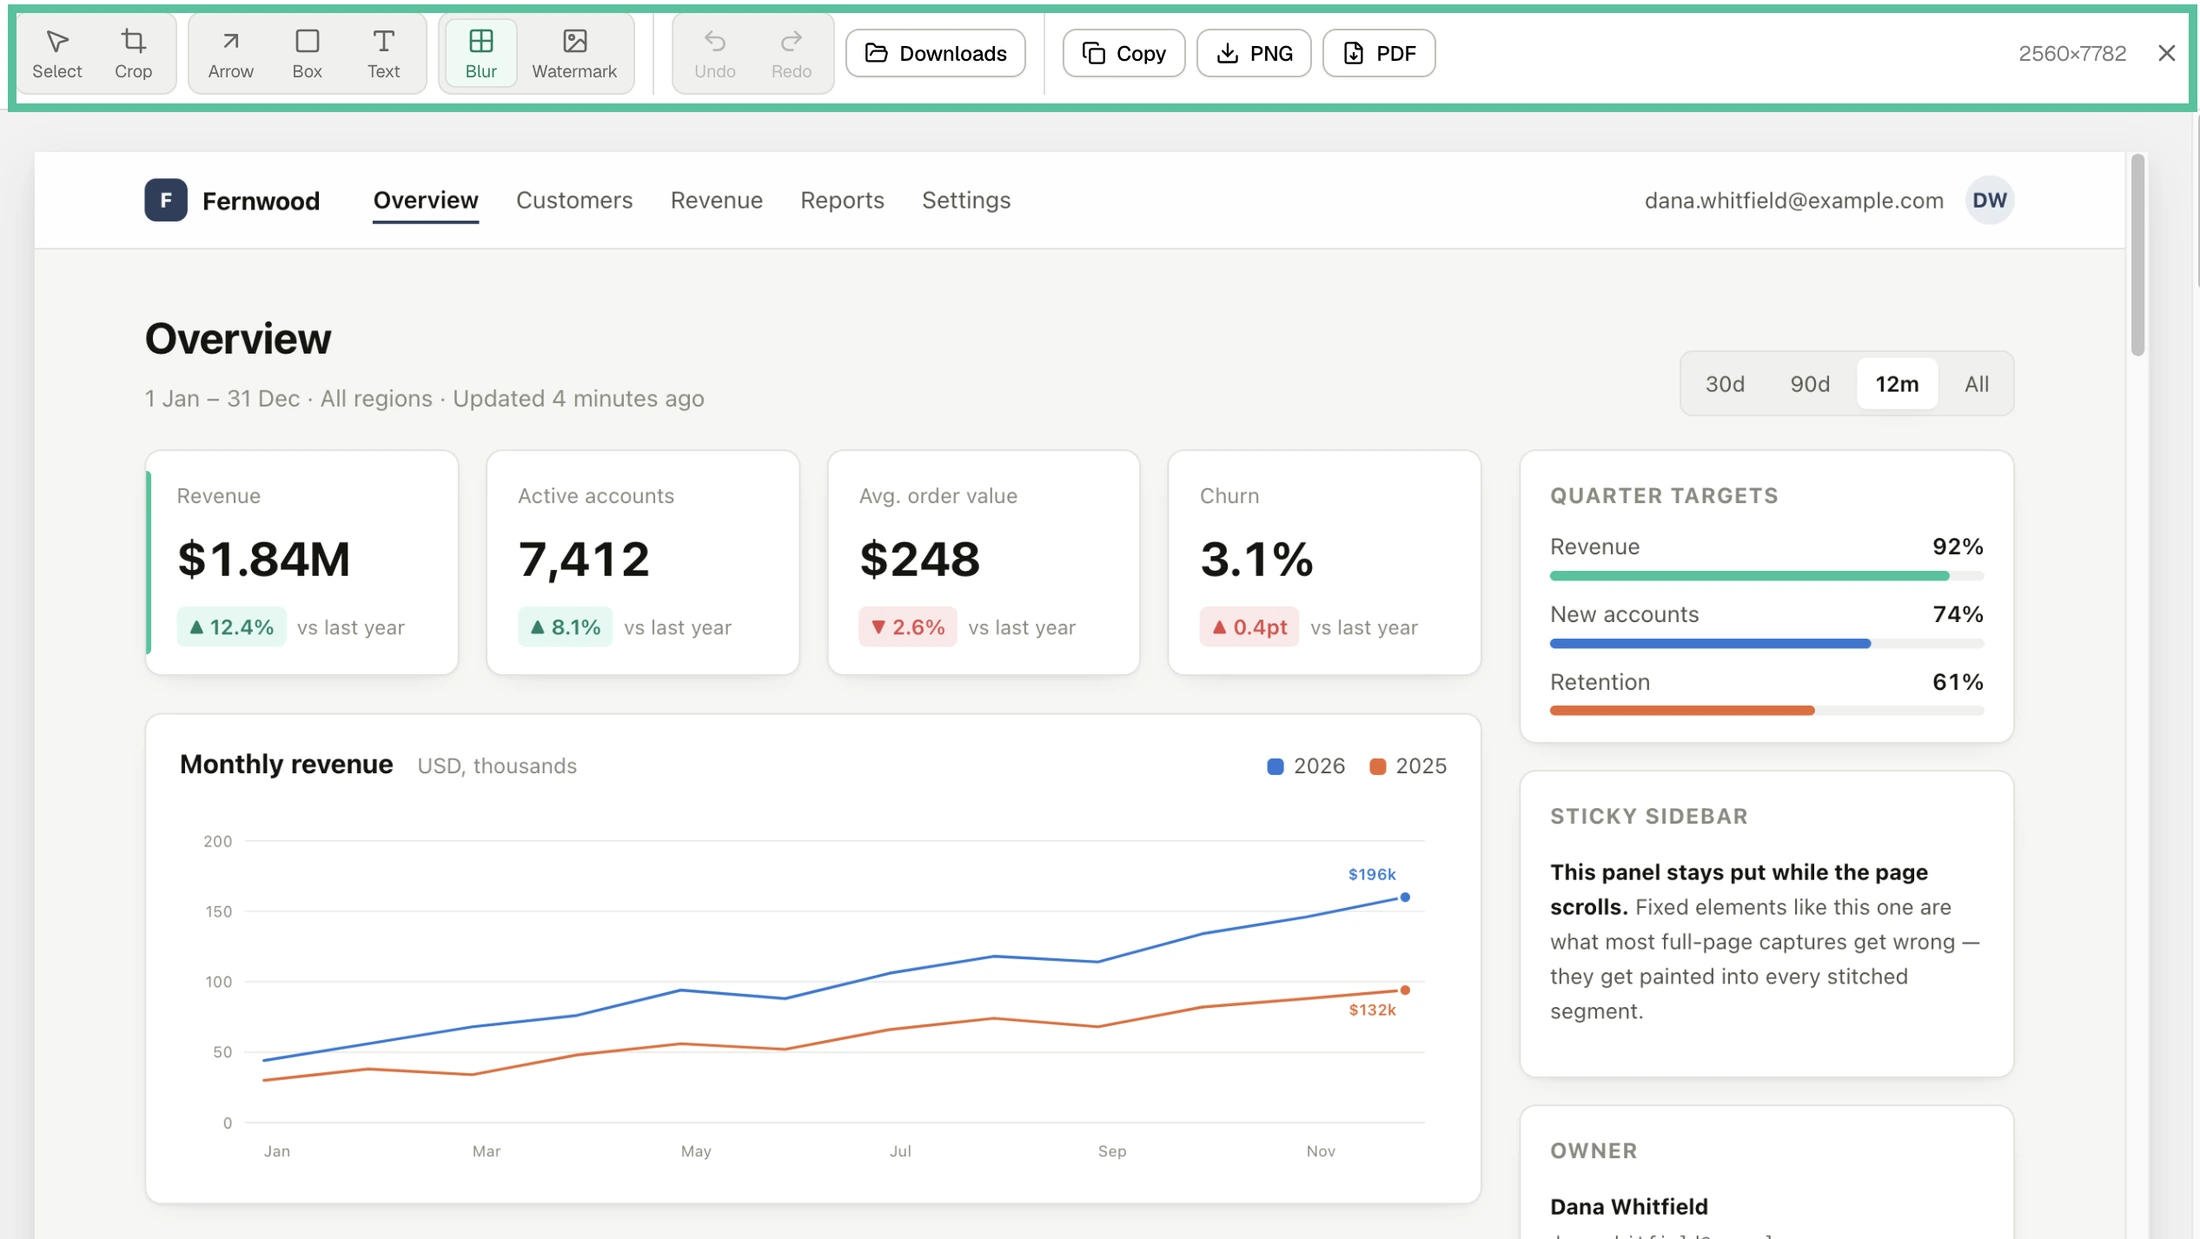
- Choose full page — it stitches the whole scroll height into one image, and renders sticky headers and fixed sidebars once, in place, rather than repeating them down the result. Or drag out a region instead.
- Edit before you export: crop, draw, add text or shapes, blur anything that should not leave your machine — all in the built-in editor, with unlimited undo.
- Export as PNG or PDF.
The capture and the export both run on your device — there is no upload step in the code path — and the source is on GitHub if you would rather read that than take it on trust. Everything above except the tiled watermark is free, and there is no account to create.
Use Web capture when the page is ordinary, a JPEG is fine, and nothing on it needs removing. It is already installed and it is one keystroke. A screenshot extension earns its place when you need PNG or PDF, when the capture comes back downscaled, when the part you want scrolls inside a panel, or when something has to be blurred out before the file leaves your machine.
Edge is not short of screenshot extensions — it is short of audited ones
The Edge Add-ons store carries plenty of screenshot tools, most of them ports of Chrome extensions. The thing worth checking before you install any of them, this one included, is what the extension is allowed to do with the page it can read. OpenCapture is AGPL-licensed and every line of it is public, so the answer is checkable rather than promised; what the permissions in the manifest actually grant is in what a screenshot extension’s permissions really mean. The alternatives, with what each one does better, are on the comparison page.
A screenshot extension for Edge, free and open source
Questions
Does Microsoft Edge need a screenshot extension?
Not for an ordinary page. Web capture is built in, opens on Ctrl + Shift + S, and captures the full scroll height. A screenshot extension for Edge earns its place at five specific points: when you need PNG rather than JPEG, when the full-page capture comes back downscaled, when the part you want scrolls inside a panel, when something on the page has to be blurred out before you send it, and when the output has to be a PDF.
Why is my Edge full page screenshot blurry or unreadable?
Two things stack up. Capture full page renders the page slightly smaller than it was on screen, which users have measured at around 94 per cent, and there is no setting that turns that off. The result is then written as JPEG, a lossy format that softens small text and thin lines further. Capture area, which does not rescale, comes back sharp on the same page.
Can Edge save a screenshot as PNG or PDF?
Web capture saves a .jpeg file and offers no other format, so neither PNG nor PDF comes out of it. Ctrl + P and Save as PDF does produce a PDF, but it re-typesets the page for paper rather than keeping it as it looked on screen. To get a PDF that looks like the page, capture it as one image and export that image to PDF.